Running Hubzilla with a YunoHost server
Anyone running a server (whether at home on their own hardware – usually with dynDNS – or on a rented VPS or dedicated server) using YunoHost will find it easy. The software takes care of a great deal of the detailed administrative work and offers countless applications that can be installed, set up and maintained with minimal effort.
Hubzilla is also one of the apps offered by YunoHost. Hubzilla can be installed with just a few inputs and minimal requirements.
You need your own domain or subdomain. It is important to ensure that no other Fediverse software has been installed under this domain before. This is a “peculiarity” of the Fediverse. Once used, domains are ‘burned’ for the Fediverse if you wish to install new or different Fediverse software under them. But never mind… let’s assume we have a fresh, ‘virgin’ domain. Then the installation is done with just a few clicks and inputs.
Unfortunately, however, the “Hubzilla” app is no longer actively maintained by YunoHost. This means that updates (including important, security-related ones that need to be applied promptly) are only introduced with significant delay. At times, there is a backlog of several months, and the version offered is sometimes several updates behind. This is not advisable for security-critical software.
For precisely this reason, I have installed Hubzilla on YunoHost in a different way. The advantages that YunoHost offers are retained (easy backups, no manual setup of reverse proxies, an up-to-date underlying system, database setup, etc.).
And here’s how it works:
YunoHost offers a ‘universal app’, which is called ‘My Webapp’. This can be used to install a customised web application. It offers SFTP access, a database and PHP if required. A directory is created under /var/www, which can be accessed via the domain selected during installation.
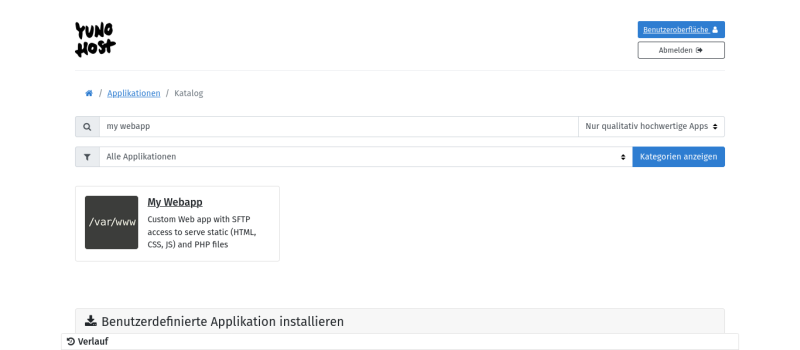
This is the ideal location for a Hubzilla installation. The first step is to create a corresponding domain in YunoHost and, of course, create a certificate (Let’s Encrypt). This works in exactly the same way as for the ‘normal’ Hubzilla installation, e.g. with the YunoHost administration interface. Select the ‘My Webapp’ application from the catalogue under Applications → +Install.
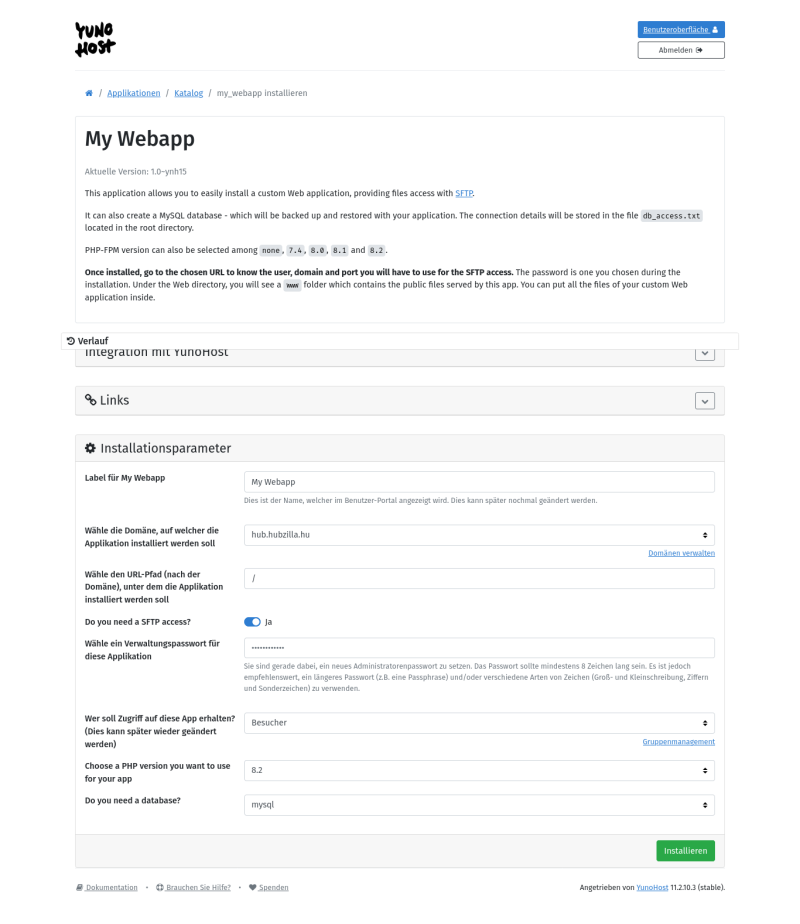
You can now enter a name for the tile’s label (in the YH interface) and select the domain or subdomain. To avoid problems, you should leave only “/” in the URL path field. For a public hub, select “Visitors” in the “Who should have access to this app?” field.
For the PHP version for Hubzilla, currently select >=8.2 (I would currently recommend version 8.4) and then the database type (MySQL or PostgreSQL).
Then start the installation of the custom web app.
Once it has finished, you must log in to your own server via SSH. In the directory /var/www you will now find a new directory my_webapp (or my_webapp__XX, if other ‘My Webapp’ installations already exist; XX stands for a sequential number) and within this a subdirectory www. The latter is the directory served by the web server when the domain is accessed.
You can now easily install Hubzilla by following the official installation guide. In the root directory (my_webapp/www) you will find a file db_access.txtcontaining the database credentials. Important: make a backup! We will still need this information (database name, database user, database password) for the Hubzilla installation.
Now the directory my_webapp/www must be emptied, i.e. all files within it must be deleted, so that the Hubzilla repository can be cloned there.
To ensure the file permissions are correct straight away… and generally speaking anyway, it is advisable to continue at this point as the user ‘my_webapp’ (or my_webapp__XX). To do this, enter
yunohost app shell my_webapp
.
You are now in the directory my_webapp. With
git clone https://framagit.org/hubzilla/core.git www
you clone the repository to the correct location. Afterwards, it is best to switch immediately to the directory www:
cd www
A file named .htaccess is also created during cloning. This is used to configure the Apache web server. However, YunoHost uses nginx rather than Apache, so this file is irrelevant.
When installing My Webapp, configuration files are generated under /etc/nginx/conf.d/<domain of my_webapp>. However, these do not meet Hubzilla’s requirements. The my_webapp.conf must look as follows:
#sub_path_only rewrite ^/$ / permanent;

location / {
  # Path to source
  alias /var/www/my_webapp/www/;
  if (!-e $request_filename) {
    rewrite ^(.*)$ /index.php?q=$1;
  }

  # Default indexes and catch-all
  index index.php;
  charset utf-8;

  # Common parameter to increase upload size limit in conjunction with dedicated php-fpm file
  client_max_body_size 50M;
  client_body_buffer_size 128k;
  location ~* \.php$ {
    try_files $uri =404;
    fastcgi_pass unix:/var/run/php/php8.2-fpm-hubzilla.sock;
    fastcgi_index index.php;
    include fastcgi_params;
    fastcgi_param SCRIPT_FILENAME $document_root$fastcgi_script_name;
  }

  # make sure webfinger and other well known services aren't blocked
  # by denying dot files and rewrite request to the front controller
  location ^~ /.well-known/ {
    allow all;
    if (!-e $request_filename) {
      rewrite ^(.*)$ /index.php?q=$1;
    }
  }

  # statically serve these file types when possible
  # otherwise fall back to front controller
  # allow browser to cache them
  # added .htm for advanced source code editor library
  # location ~* \.(jpg|jpeg|gif|png|ico|css|js|htm|html|map|ttf|woff|woff2|svg)$ {
  #  expires 30d;
  #  try_files $uri /index.php?q=$uri&$args;
  # }

  # block these file types
  location ~* \.(tpl|md|tgz|log|out)$ {
    deny all;
  }

  # deny access to all dot files
  location ~ /\. {
    deny all;
  }

  #deny access to store
  location ~ /store {
    deny all;
  }

  #deny access to util
  location ~ /util {
    deny all;
  }

  # Include SSOWAT user panel.
  include conf.d/yunohost_panel.conf.inc;
}
Note:
In line 6, the alias path must correspond to the installation of ‘My Webapp’. If this was not the first ‘My Webapp’ installed on the YunoHost server, the path is no longer /var/www/my_webapp/www/, but /var/www/my_webapp__XX/www/ (‘XX’ should be replaced with the appropriate number) .
In line 22, the version of PHP selected during the installation of ‘My Webapp’ must be correctly referenced. So /var/run/php/php8.4-fpm-my_webapp.sock or /var/run/php/php8.3-fpm-my_webapp.sock or /var/run/php/php8.2-fpm-my_webapp.sock.
For a Hubzilla installation, several directories with the appropriate access permissions are essential within the Hubzilla directory (in this case my_webapp/www). These are actually created during installation via the web browser (though apparently not always). However, it is safer and does no harm to use
cd www
to change to the Hubzilla directory and create these with
mkdir -p ‘store/[data]/smarty3’
chmod -R 777 store
To install the Hubzilla add-ons as well, you must also enter
util/add_addon_repo https://framagit.org/hubzilla/addons.git hzaddons
util/update_addon_repo hzaddons
PHP extensions: For Hubzilla >= 9 (currently 11.2), the PHP extensions sodium, gmp (or bcmath) and intl are required. On my YunoHost installation, sodium and gmp were present, whereas intl was missing.
You can find out which extensions are installed and enabled using this command:
php -m
With
sudo apt-get update
and
sudo apt-get install php8.4-intl (again, make sure to use the correct PHP version)
the missing extension is quickly installed.
php -m | grep intl
should now display this.
Now is the time to open the URL of the new installation in your web browser.
Everything should now run smoothly (if any errors occur, investigate the cause according to the official installation guide).
You now need to open the newly created .htconfig.php file and adjust the path to PHP (make sure you use the correct version):
// Location of PHP command line processor
App::$config[“system”][“php_path”] = “/usr/bin/php8.4”;
If you are still logged in as the user my_webapp, you should use
php -v
to display the currently used PHP version. Version 8.4 (or the selected version) should be displayed.
Now comes another very important step: creating a cron job for important background services.
To do this, run
crontab -e
and add the line
*/10 * * * * cd /var/www/my_webapp/www; /usr/bin/php8.4 Zotlabs/Daemon/Master.php Cron > /dev/null 2>&1 (again, make sure to check the PHP version).
And now the Hubzilla installation on YunoHost should be running smoothly. The rest should be familiar (first register an account using the email address provided earlier… this is the admin account) and then simply “use” it. ;-)
IMPORTANT NOTE REGARDING YUNOHOST UPDATES:
When an update for ‘My Webapp’ is released, the nginx configuration file in /etc/nginx/conf.d/yourdomain.d/my_webapp.conf may, under certain circumstances, be overwritten with default settings, causing Hubzilla to stop working.
It is therefore advisable to keep this configuration file in a separate backup directory on the server and use it to overwrite the updated file. Alternatively, you can extract it from the backup file created automatically by YunoHost during the update and copy it back into the directory mentioned above (overwriting the existing file).
IMPORTANT NOTE ON AUTHENTICATION (WEBDAV and cloning channels)
In the current version of YunoHost, a security mechanism is automatically activated which partially prevents external authentication. In the case of Hubzilla, this particularly affects the WEBDAV mechanism and the online cloning of channels.
To ensure that both access to the cloud via WEBDAV and the cloning of channels from the hub using login credentials work, this protection mechanism must be disabled for the ‘My Webapp’.
To do this, enter the commands
yunohost app setting <NAME-OF-my_webapp> protect_against_basic_auth_spoofing -v false
and
yunohost app ssowatconf